Detailed Instructions
1. Open the “Remote Desktop Connection Properties” window by right-clicking on the “Remote Desktop Connection” shortcut on the desktop and selecting “Properties” at the bottom of the menu (Figure 1).
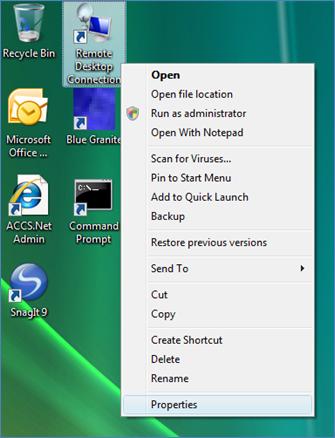
Figure 1 Remote Desktop Menu
2. When the “Remote Desktop Connection Properties” window opens, click on the “Shortcut” tab (Figure 2).
3. In the “Target:” textbox, ensure that /admin has been appended to the text statement; if it has not, add the command (Figure 2). Click the “Apply” button followed by the “OK” button.
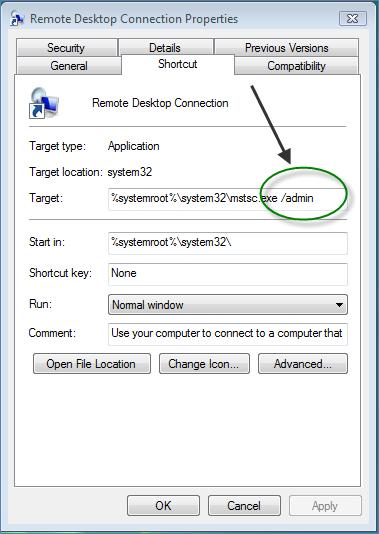
Figure 2 Remote Desktop Connection Properties Window
4. Once the window closes, double-click the “Remote Desktop Connection” icon to open the Remote Desktop client (Figure 3).
5. Begin connecting to the mail server by entering the IP address and port number of the server in the drop-down text box labeled “Computer:.” Click the “Connect” button.
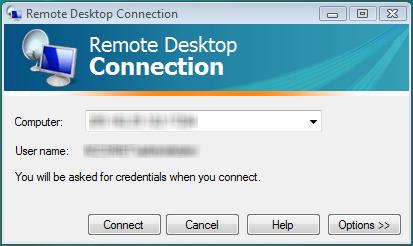
Figure 3 Remote Desktop Connection Client
6. If the pop-up window, shown in Figure 4, appears, click the “Yes” button.
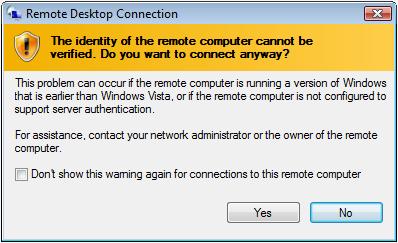
Figure 4 Remote Desktop Connection Client – Warning Window
7. The window in Figure 5 will appear. Enter the proper User Name and Password in their respective textboxes (if necessary), and click the “OK” button.
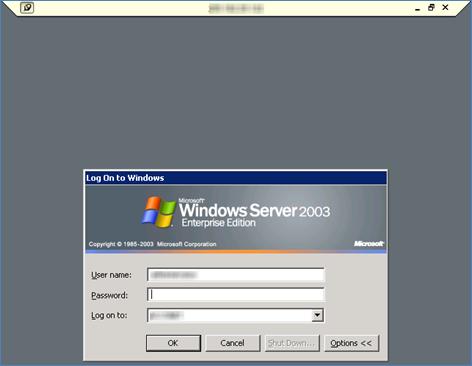
Figure 5 Remote Desktop Login Window
8. Once the login is complete, the desktop of the remote computer should appear. Locate the “Mail Logs” shortcut, and double click it to open the folder (Figure 6).
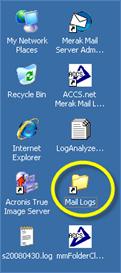
Figure 6 Remote Desktop Taskbar – RadiusNT Pop-up Menu
9. Locate the log file containing the pertinent e-mail log entry (Figure 7). Right click on the log file and select “Copy” from the pop-up menu.
a. The naming format of the log file starts with the letter ‘s’ followed by the year, month, and date of the log (ex. “s20080717.log” is the log file name for July 17, 2008).
b. DO NOT DIRECTLY OPEN THE LOG FILE!
DIRECTLY OPENING THE LOG FILE WILL CAUSE THE MAIL SERVER TO SUBSTANCIALLY SLOW
DOWN AND/OR CRASH!

Figure 7 Remote Desktop – File Copy
10. Close the “Mail Logs” folder by clicking the “X” in the upper right corner of the window.
11. Place a copy of the mail log on the desktop by right clicking and selecting “Paste” from the pop-up menu (Figure 8).
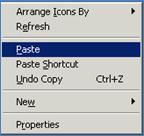
Figure 8 Remote Desktop – File Paste
12. A status window will appear indicating that the file is being copied to the desktop (Figure 9).
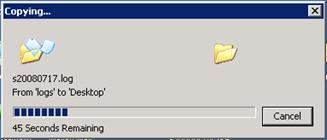
Figure 9 Remote Desktop – Copying Status Bar
13. Open the Merak Mail Server Log Analyzer program by double clicking on the “LogAnalyzer.exe” icon on the desktop (Figure 6).
14. Open the “Filter” window by pressing the “CTRL” and “T” keyboard buttons at the same time (CTRL+T).
15. Click the “Edit” button at the bottom of the window (Figure 10).
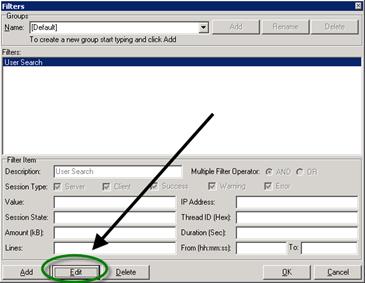
Figure 10 Log Analyzer – Filter Window
16. Replace any text in the “Value:” textbox with information (typically customer e-mail address) pertinent to the mail log entry. Click the “Edit” button again to save the filtering term. Close the window by clicking the “OK” button.
17. Locate the mail log by following the file topography as follows: “Documents and Settings” à “Administrator” à “Desktop” à “SMTP” (Figure 11).
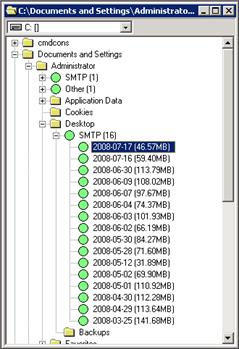
Figure 11 Log Analyzer – File Topography
18. Double click on the date of the mail log to be filtered.
19. Once the filtering is complete, a new window will open with the mail log entries containing the filter information organized by time on the left panel (Figure 12).
a. An “S” icon indicates a Server Session.
b. A “C” icon indicates a Client Session.
c. Any icon in red indicates a session with an error, which will typically be related to the missing e-mail message.
20. Double click the pertinent mail log, and the log entry will open in the right window panel (Figure 12).
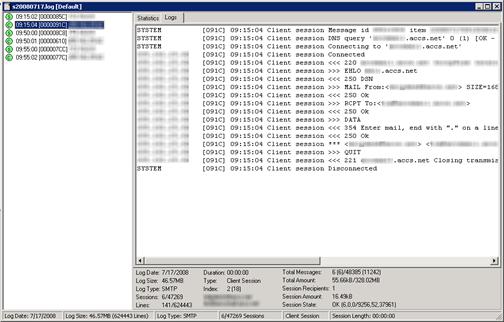
Figure 12 Log Analyzer - Entry Window
21. Once the pertinent information has been collected, close the window by clicking on the “X” in the top right corner of the window.
22. Click the “X” in the top right corner of the Merak Mail Server Log Analyzer window.
23. Close the Remote Desktop session by clicking on the “X” button in the top, right hand side of the screen. The pop-up in Figure 13 will appear. Click the “OK” button.

Figure 13 Remote Desktop – Disconnect Confirmation Pop-up